Method 1: System Group Policy Settings
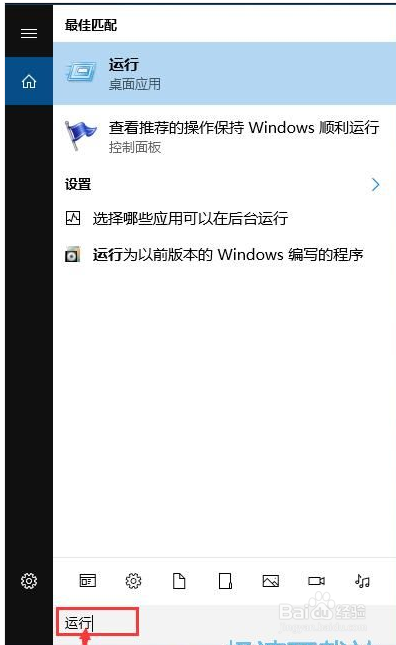
1. First open the search function of the win10 system and enter run in the search input box. Then click Run desktop application in the search results to open the system command run window;
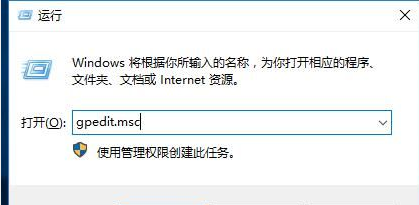
2. In the system command run window, enter "gpedit.msc" and press the Enter key of the keyboard to open the system local group policy editor, we can completely turn off the automatic update of the win10 system by setting the system local group policy Function;
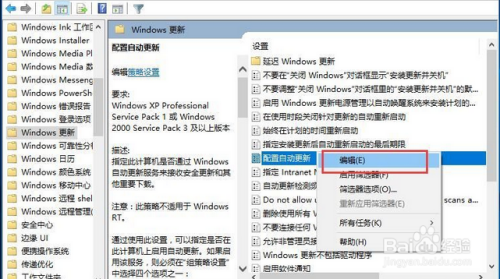
3. In the system local group policy editor, according to the folder path of "Computer Configuration/Administrative Templates/windows components/windows update", find the windows update folder;
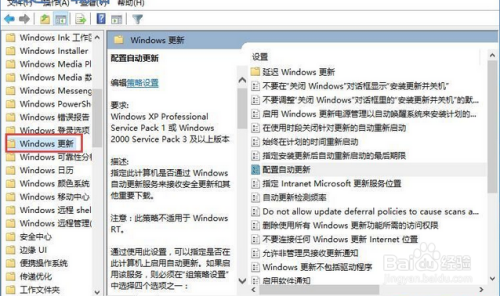
4. After opening the windows update folder, find the configuration in the folder to automatically update this item. Use the mouse to click on the mail to select the automatic update, then click the mouse mail, and click Edit in the right-click menu to open the configuration automatic update function editing window;
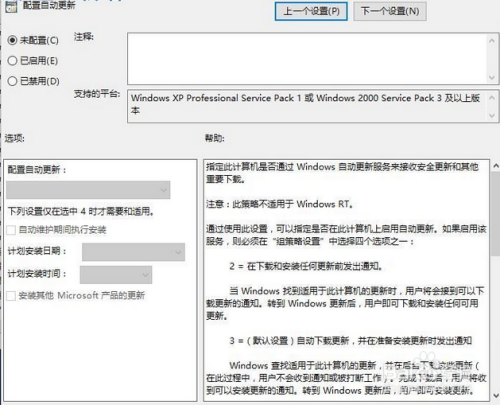
5. Open the automatic update function editing window. We can see this feature is to specify whether this computer will receive security updates and other important downloads through the Windows Automatic Update service. The default state of the feature is not configured;
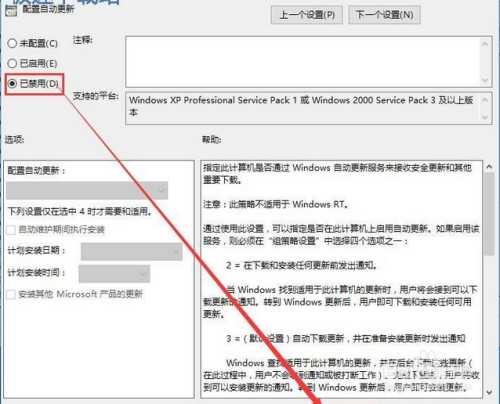
6. Click Disabled, you can click the OK button at the bottom of the automatic update function editing window to make the disabled setting take effect and disable the system automatic update function. In this way, the computer system will not be automatically updated after the setting is completed;
Method 2: System Group Policy Settings
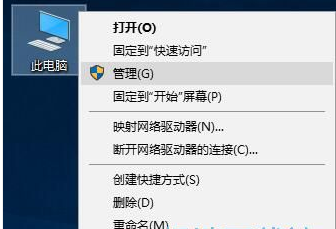
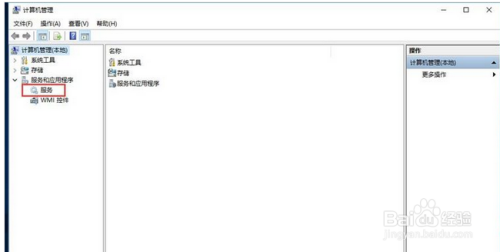
1. Set up system services. First, right-click this computer on the desktop of the win10 system, expand the right-click menu, and click Manage in the menu to open the computer management window;
2. Open the Computer Management window. At this time, we can click on the service in the computer management window to open the system service management interface;
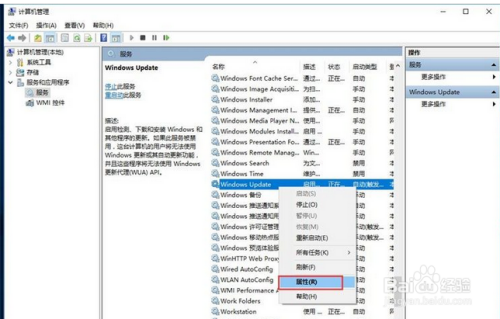
3. In the system service management interface, we need to find the Windows Update option, and we can see that the status of the service item is starting. Right-click the option, and then click Properties in the right-click menu to open the service property setting interface;
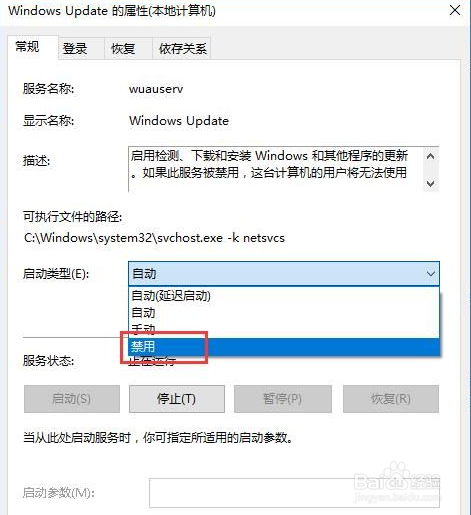
4. Open the Windows Update property setting interface. We can see that the startup type of the service is automatic, click the startup type selection button, expand the startup type selection list, select the startup type as disabled, and then click Apply to save the settings of the disabled service to the system;
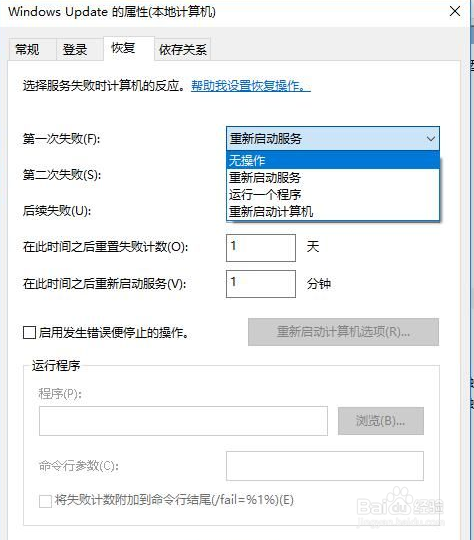
5. Next we have to click to open the Recovery tab in the Windows Update property settings interface. Sets the computer's reaction when the service fails. Seeing that the response to the first failure is set to no operation, you can completely turn off the Windows Update system service, thereby completely turning off the automatic update function of the win10 system.
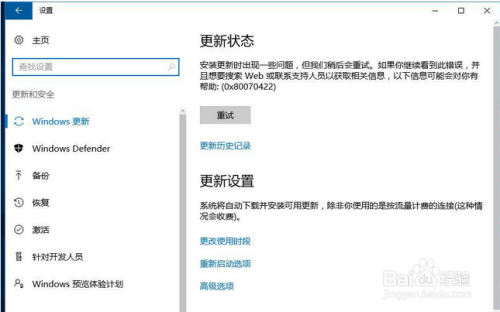
6. At this time, we reopen the Windows update page of the system, and we can see that the computer system cannot check and install system updates now, so we have completely turned off the automatic update function of the win10 system.